You can use this to set your own custom Watermarks.
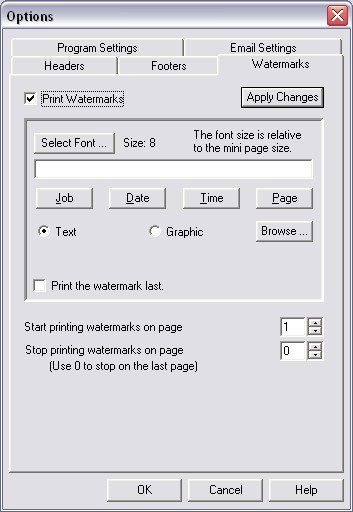
To enable the feature in this window, first check the "Print Watermarks" box.
You can enter your own custom text, and set the font. You can also use special variables that will change.
| · | Job - This is the Title of the print job
|
| · | Date - The current date. This is great for receipts, price lists, etc. where the date is important.
|
| · | Time - The current time. This is great for contracts, and documents where the revision time may be important.
|
| · | Page - The current page. This page is the page printed in the PDF, and may differ from the original document. Use this when you are combining documents and you want to re-number the pages in the PDF.
|
Text/Graphic - By selecting either the Text or the Graphic radio buttons, you can select print a 'Text' or 'Graphic' Watermark on your document.
By checking the 'Print Watermark last' box, this will have Click2PDF print the Watermark last in your PDF file.
If you PDF is intended to be a printed document with a cover or title page, you may not want to start the Watermarks on the first page.
Use the start/stop to control to select the page that you want your Watermarks to start or stop printing on.
If you just want to turn them off for this printed document, you can uncheck "Print Watermarks" without losing your settings.
The Watermark is printed in the middle of the page. You can use your own custom graphic, but you may need to lighten it up with a graphic editor to keep it from dominating the page.
Note: Watermarks may not show up on web pages and some other documents because the white background may be placed on top and obscure the watermark making it invisible.