|
Assembling a Poster or Banner
|
Previous Top Next |
| Steps:
|
|
|
| 1. Print your document to Click2Poster
|
| 2. Choose the Category and Layout size of your sign.
|
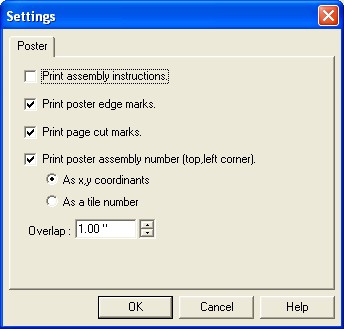
| 3. Click Settings on the Menu bar, and the Settings dialog appears. Mark check boxes for instructions that you want printed along with your sign. Press OK to save changes.
|
| · | Print Assembly Instructions - Click2Poster prints an instruction sheet with details to piece together your sign.
|
| · | Print Poster edge marks - prints a small cross |
| · | Print page cut marks - prints a dotted line |
| · | Print Poster assembly number - prints a tile number or x, y coordinates to help you piece your sign together in the correct order.
|
| · | Overlap: - type in or use the arrows to define how much of an overlap you would like printed. Measured by inches. Overlap provides you with extra cutting room so you can use scissors or a trimmer to make the poster and your cuts do not have to be perfect.
|
|
|
|
|
|
| 4. | Hit print from Click2Poster to print to your printer.
|
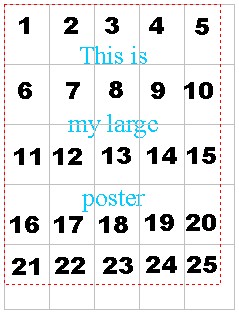
| 5. | Once you've printed your poster you will have a stack of paper. Click2Poster has been designed so that you should be able to take the stack and lay the pages out from left-to-right and then top-to-bottom, the same way that you read a book.
|
|
|
|
| 6. We suggest that you trim off the excess white space. The white space is because of the non-printable area of most printers. Once you trim off the white space, you can line up each page with its previous page and tape it together. Here are some options for fastening the pages together:
|
| · | Staples
|
| · | Tape
|
| · | Glue onto poster board
|
| · | Staple directly to a wall or bulletin board
|
| · | Spray on Adhesive - http://www.bluesquirrel.com/cart/cart.asp?P=ADHESIVE
|