0
ClickBook has the ability to create electronic forms and letterhead.
After you create a form in ClickBook you can set ClickBook to use that form in the Modify layouts screen. The ClickBook preview feature will show how your output will appear before you print it. This ensures that your document is aligned correctly with the form you have selected.
ClickBook comes with 3 sample forms/letterhead:
| 1. | Blue Squirrel Letterhead.cbf |
| 2. | Purchase Order.cbf |
| 3. | Sample Background.cbf |
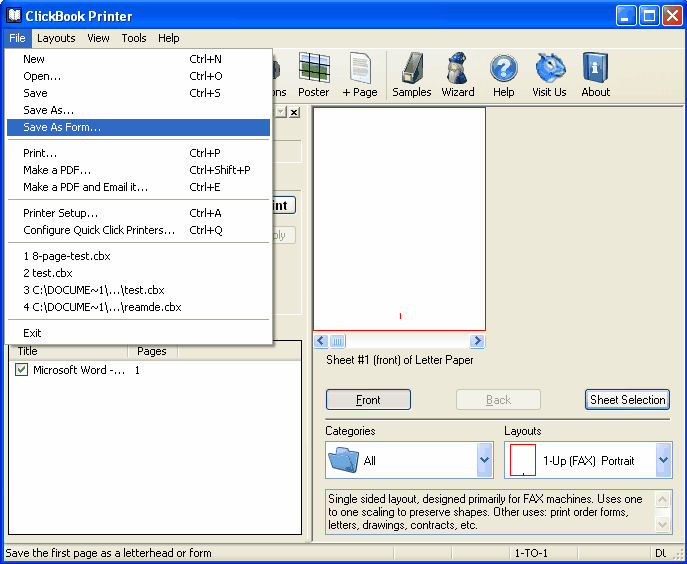
How to create a form:
| 1. | Create a form in a separate application, like you would a normal document (1 page only), then print it to ClickBook. |
| 2. | Select the layout named: 1Up(Fax) |
| 3. | Then go to File> Save As Form. |
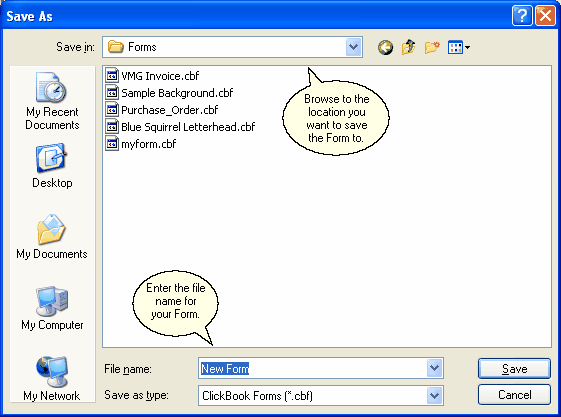
4. The Save As dialog will Open, and it will default to your My Documents folder.
5. Browse to the directory you want to save the form to.
6. Name the form and click Save.
How to select a form to print in ClickBook
To select a form to print in ClickBook, select the form from the Modify Layouts screen.
1. Print your document to ClickBook
2. Select the layout you want to print with.
3. Go to Layouts> Modify Layouts (or right click on the preview and go to Modify Layouts.)
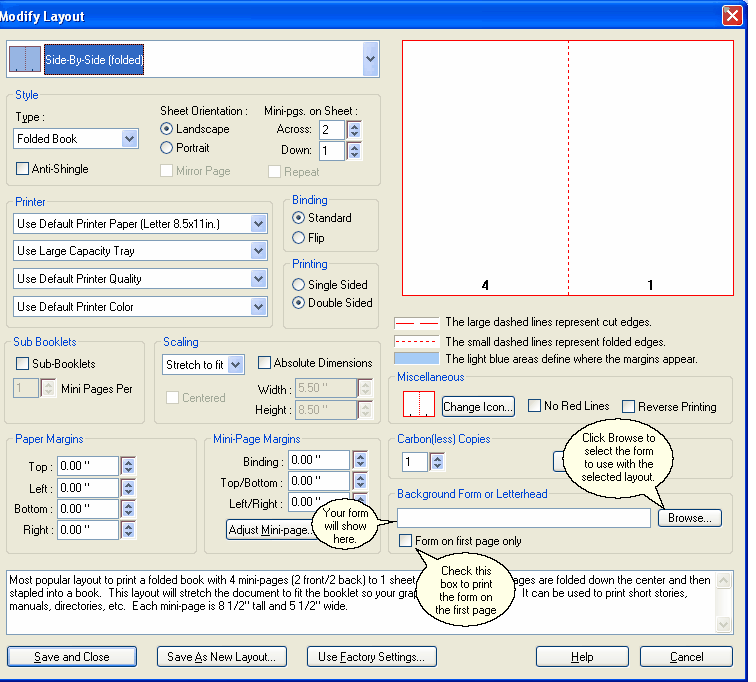
4. Click on the 'Browse' button next to foms to select the form you want to print with the selected layout. (This form will be associated with this layout each time until you remove the form.)
5. Browse to the location you have your ClickBook forms saved to.
6. Select the Form to use and click Open.
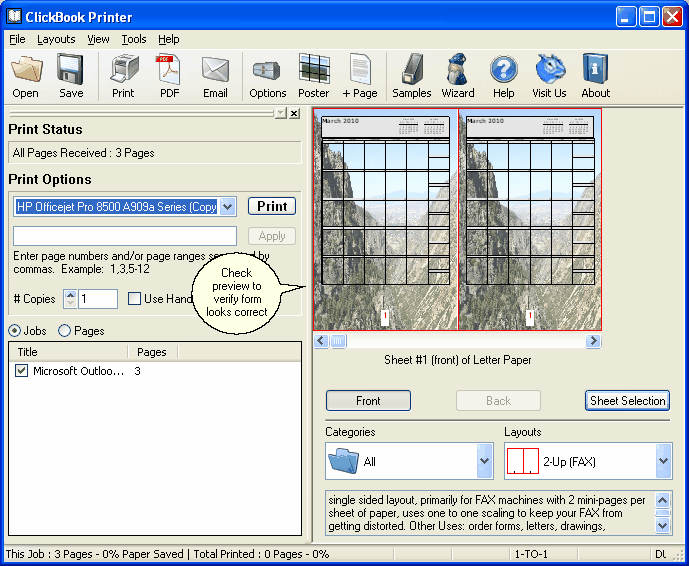
7. Check the preview to ensure that your form looks correct.
TIP: You can setup Quick Click Printers to use Forms as well, simply set the form in the layout that you are using for the Quick Click Printer.