Quick Click Printers allow you to automate the printing process, and send print jobs directly to the printer without ClickBook intervention. You can instantly print side-by-side folded booklets, convert to PDFs, or print flipbooks with a single click. You will setup a ClickBook printer with your preferred layout. ClickBook will then make a custom Quick Click printer that is tied to your printer and a specific ClickBook layout. The Quick Click Printer will always print the same way each time to your printer. You can even setup a PDF Quick Click printer that will automatically convert files to PDFs, email them with your default email client, and add any encryption or password preferences. No more hassle thumbing through all of the layouts, simply setup a Quick Click Printer and let ClickBook handle the rest. By default there are two Quick Click Printers setup. "Side By Side Folded" prints standard 8.5x11 side-by-side folded booklets, and the second "PDF Converter" converts files to PDFs.
To setup a Quick Click Printer follow these steps:
| 1. | Open ClickBook and go to File, and select Quick Click Printers. The Quick Click Printers dialog will appear. |
| 2. | Click on New |
| 3. | Select a layout from the drop down menu. |
| 4. | Choose a radio button to Print Immediately or Open ClickBook. |
| 5. | Select your printer from the Print To drop down menu. Please note, If you would like to use the hand fed tray on your printer you'll need to mark the check box next to the Print To drop down. If the hand fed tray option is greyed out you will need to setup a standard ClickBook printer first with the hand fed option. See Automatic Printer Setup for instructions. |
| 6. | Press Close when you are done. |
To setup a PDF Conversion Quick Click Printer follow these steps:
| 1. | Open ClickBook and go to File, and select Quick Click Printers. The Quick Click Printers dialog will appear. |
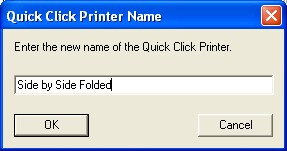
| 2. | Click on New and type in a name for your custom Quick Click Printer. |
| 3. | Select a layout from the drop down menu. Note, if you want your PDF file to be a standard 8.5x11 size choose the layout "1-UP (Fax) Portrait". |
| 4. | Choose a radio button to Print Immediately, which will convert to a PDF without opening ClickBook, or choose the radio button to Open ClickBook. |
| 5. | Select the ClickBook PDF Converter printer from the Print To drop down menu. Doing so activates all options for the PDF Settings. |
| 6. | Mark check boxes alongside the items, such as Save In, Email To, and Encryption that you wish to set custom preferences. |
![]() Marking the check box for Save In allows you to set a specific location on your hard drive where you would like to save and store PDF files.
Marking the check box for Save In allows you to set a specific location on your hard drive where you would like to save and store PDF files.
 If you check the Email To box this allows you to enter an Email address that you will frequently send PDF files to, and the Email Message section allows you to type a text message to the receiver. NEW! You can now add a subject line in your Quick Click Printer emails.
 Marking the check box for Encryption gives you options to set a password and ask for the password, detect whether you want 40Bit or 128Bit encryption, and assign rights to viewers. Mark the check box Change PDF if you want viewers to have the right to edit the PDF. Mark the check box next to Print PDF if you want viewers to be able to print the PDF. Mark the check box Copy Text if you want readers to have permission to copy and paste text. Mark the check box for Add Notes if you want give readers the option to add notes to the PDF file.
7. Click Close to exit the Quick Click Printers dialog box.
***NEW***: You can now Activate and Inactivate Quick Click Printers. This allows you to have multiple Quick Click Printers setup, without having all the printers listed in your printers folder.
***NEW*** When you setup a PDF Quick Click Printer with 'Auto Name' ClickBook will now intelligently save the same file(s) by adding alphanumeric characters to the end of the file name. (Example: README.pdf, README-0001.pdf, README-0002.pdf)