You can use ClickBook to create a banner of any size (Windows Vista, XP, 2000, Vista, 7only). And you can use your favorite program to make the banner.
Our example uses Microsoft Word, but you can also use WordPad which comes with Windows, or any other Windows program.
The key to creating a banner in ClickBook is to make your text go all the way across the paper in your source document. The easiest way to do this is to increase the font size until you've gone across the paper. You should set the paper margins to 1/4 inch in Page Setup... in Microsoft Word to make sure you go all the way across the paper.

You can also make tall banners. Have the text go down the left side of the page from top to bottom.
You are not limited to one line of text for your banners. Just make sure the longest line goes all the way across the page. Also make sure you put your text at the very top of the page.
Steps:
| 1. | Print your document to ClickBook |
| 2. | Choose the Poster Wizard |
| 3. | Choose Crop/Banner (1:1) from in the Poster Wizard |
| 4. | Choose how wide you want your banner, and how tall you want your banner |
Tip: When choosing how wide and how high you want your banner, keep in mind the shape of your banner. In the example above, you might make it 6 feet long and 1 foot high to keep the right shape. Or 12 ft x 24" also works. But 12 ft x 15" is not the right shape and does not work. See the examples below. The width will always fit. You should adjust the height of the banner to make sure you don't chop off the bottom of your text.
6 ft x 12" (RIGHT)
![]()
12 ft x 24" (RIGHT)
![]()
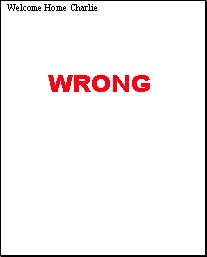
12 ft x 15" (WRONG)
![]()
Tip: Center your text at the top of the page, and then increase the font until your text goes edge-to-edge.