Use the Adjustable Mini-Page feature to reposition your document within the layouts mini pages, or enlarge the font. You will input how far left/right and up/down you want to reduce the mini-page margins to enlarge text and graphics. NOTE: Adjusting mini pages may cause clipping of fonts if they are adjusted too much.
To use this feature proceed with the following steps:
| 1. | Click on the Options button |
| 2. | Choose the Print Settings tab and place a check in the box entitled Enable Adjustable Mini-pages. |
| 3. | Click OK, and ClickBook will enable Adjust Mini-page button |
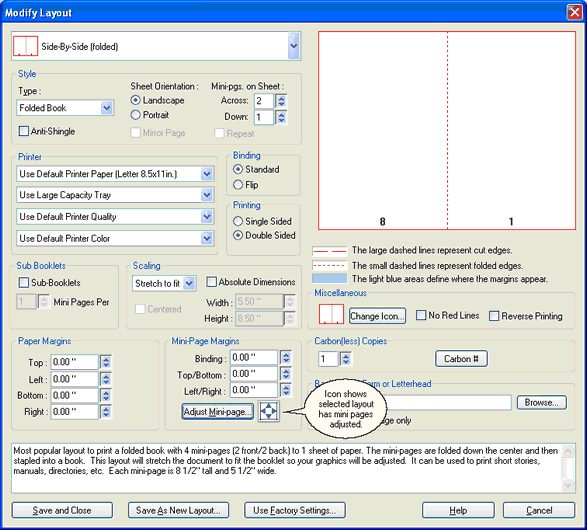
| 4. | From the Menu bar open Layouts and select Modify Layout. The Modify Layout dialog appears. |
| 5. | Choose the Adjust Mini-page button under Margins. The Adjust Mini-Page Dialog appears. |
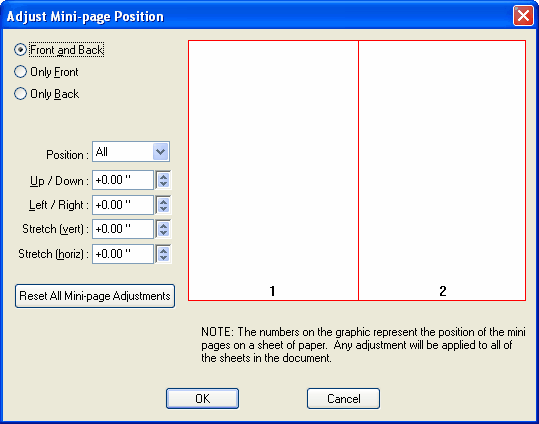
| 6. | Adjust the Margins to your liking. For example, to print an enlarged booklet with centered text you'll reduce the position by .5 inch up, and to the left. The you'll need to compensate for the bottom and right margins by reducing them 1 full inch. |
| 2. | Mark the check box next to Apply position 1 adjustments to all mini-pages if you want the adjustments to appear on all pages of your booklet. |
| 3. | Press OK. Review the changes in the Print Preview, and repeat steps 1 through 6 to further adjust. |
You will see a small icon next to the adjust mini page button, if the mini pages of the selected layout have been modified.